When it comes to art I love creating multimedia artworks. The past couple of years I have experimented a lot with materials. Hence I though it would be fun to try something I have never done before: textile paint! A side from drawing I think it is cool to design products that I could also actually use. When I think of textile paint, I automatically think of shirts, pillowcases, upscaling old jeans, bedsheets etc. In other words: unlimited possibilities.
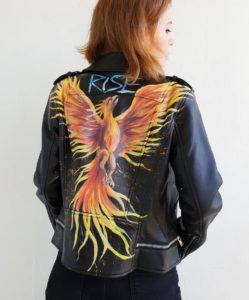
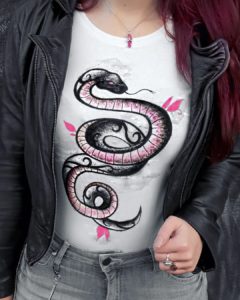
My biggest source of inspiration in this area is Daria creative on instagram! She makes neutral clothing special by the using textile paint! See the example below:
https://www.instagram.com/dariacreative/?hl=nl
The product
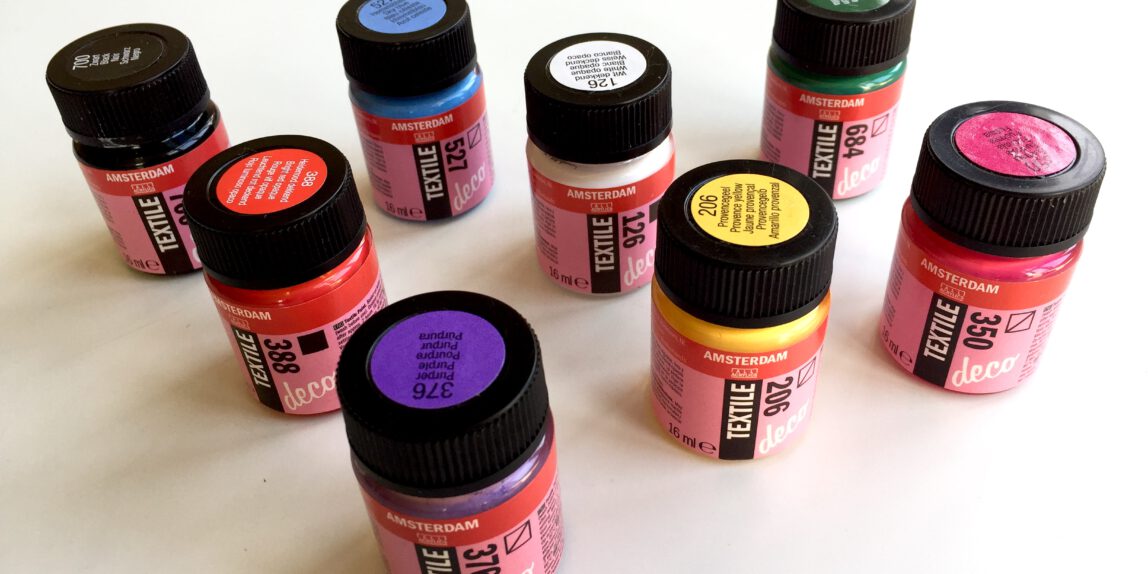
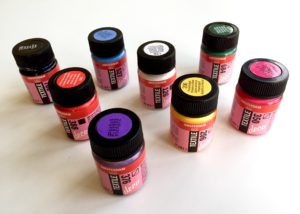
Busch & van der Worp sent me eight beautiful colours form the brand ‘Amsterdam all acrylics textile’. The textile paint is available on their website. A part from the standard black and white, blue, red, yellow and green, I also received some cool neon pink and lilac. The jars look very clean and modern, makes you want to use them straight away!
The following is stated on the packaging: ‘’ Water based textile paint. For cotton, linen and mixed fibers, wash before use. High coverage colours are also suitable for dark textiles. Dry after approximately 2 hours. Iron the backside for 3 minutes on cotton setting. Washing up to 60 degrees’’.
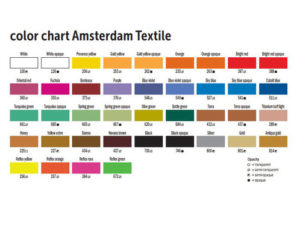
There are a total of 40 colours available, and they are grouped based on the degree of transparency. I got the following colours: 700, 126, 527, 684, 388, 206, 350 and 376. As you can see, the colours white and red are under the category ‘opaque’, and the others are labeled ‘ semi-transparent’.
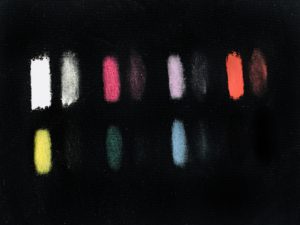
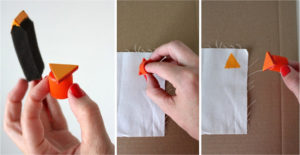
To really see how opaque and bright the colours are, I first tested the colours on an old black cotton shirt. As is stated on the packaging and can be read on the internet, you can mix the paint with water. What is striking is the difference between the opaque (white and red) and the transparent colors. Opaque gives intense coverage while the transparent colors overflow into the fabric. White in particular seems very useful to use as an opaque version because it can be applied nicely as a kind of basic layer to make the other colors come into their own.
Because they were also mixable and water-based, I’ve also tested them with water diluted. You can see that the paint emits pigment, even with a lot of water and black textiles!
As stated on the packaging, the opaque colors are suitable for dark textiles. I certainly agree with this, but the transparent colors also come into their own right (with a somewhat thicker layer of paint). My advice for this is therefore to use the white as the underlayer.
Painting a shirt
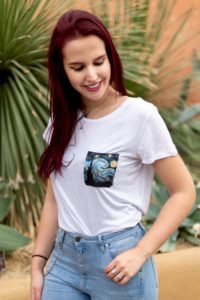
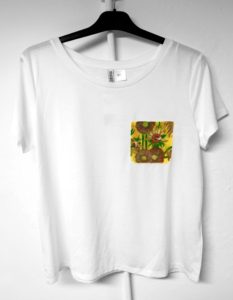
After having spent hours on Pinterest and brainstorming, I had too many ideas. I am someone who likes to go big or go home, even if it is smarter to keep it simple when you are trying out a new material type for the first time. In the end, I went for white shirts with painted breast pockets. Minimalistic and yet enough for me to go all out on a small area. It’s also easy to incorporate with your existing wardrobe.
Starry night and the Sunflowers of our beloved Vincent van Gogh eventually became the project of my future new shirts! I have dealt with painting just as much as I always do on paper.
The textile paint felt familiar, it feels the same way and behaves as acrylic paint 🙂 The paint can be mixed with other colours, it can also be diluted with water and dries quickly.
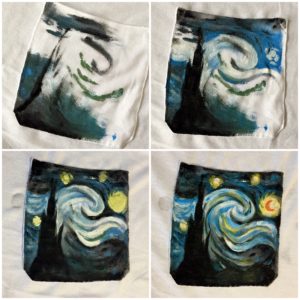
Starry night
Curiously I started mixing colours and painting the background. With the 8 colours I managed to make a varied number of colours! Because the paint dries quickly and the colours are opaque you can easily work over previous layers. This gives you the space to paint your composition with paint. Think of the layout of your canvas and the sketching of shapes and contours. By sketching from background to foreground the starry night and sunflowers quickly came a live!
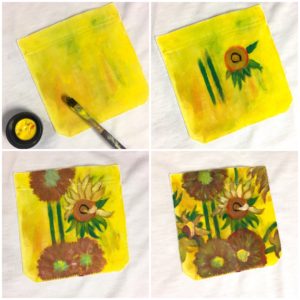
Sunflower shirt
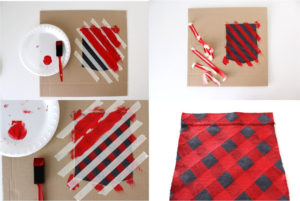
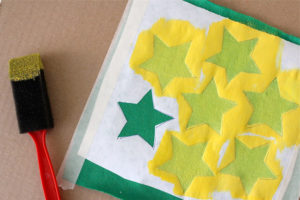
When the paint seemed to be drying, I reactivate it with some water (since the paint is also water-based). As a result, all colours flowed nicely into each other and became a whole. What I did not keep in to account was the fact that paint mixed with water also ends up at places you do not want it to be. That is why it is advisable to tape your painting surface first, it decreases the chance of it getting messed up.
Furthermore, I’ve also noticed that it is difficult to paint small details with this paint (the same applies to acrylic paint). Brushes of good quality and small of size are recommended!
Certainly on small surfaces I find it difficult to make lines nicely definable and tight. What helped me was to paint over it with your background colour, this will make everything look streamlined!
Tip:
When you are creating something more detailed it is great to combine the textile paint with textile pencils or even fine liners! This allows you to draw lines tighter and use the paint to colour large surfaces, making the colours come out beautiful! Except for the finishing of the lines, I was able to make my shirt below solely with the textile paint!
Ironing and washing
After painting the t-shirts, I ironed them as described on internet and the packaging. Ironing is needed to make sure that the textile paint will set in, and also to prevent it from coming off. To let the paint set, you need to put the iron on the highest possible heat and fix it for 3 minutes. Make sure you turn your t-shirt inside out first before doing so. The textile paint is suitable for washing machine. Don’t forget to turn the shirt inside out during laundry too. You can wash them on low temperature (30 degrees Celcius) with a detergent that’s suitable for color. I was pleasantly surprised when the shirts were undamaged after laundry. The painting on the shirt stayed true to its original design and did not stained other materials.
Conclusion
If you like being creative with your hands, I definitely recommend this paint! Dyeing textiles is something new and fun to do! So you can have that personal shirt that you always wanted, besides that you can also pimp your old cushions or curtains!
The paint itself covers nicely and is very user-friendly: can be used straight out of the pot, mixed with other colours and diluted and flowed with water. Because it can be mixed, you only need a few colours. There is also a lot of choice in the colours and degree of transparency.
Make sure you have good brushes and think in advance what you would like to paint! Do not start too difficult, and tape off your textile to make sure you cannot mess it up.
And remember: there is nothing wrong with some imperfections! It is actually great when you can see that your shirt is hand painted! This makes it unique.